Water leaks and moisture problems in a caravan are often more frustrating than an electrical or engine fault, because they’re slow to notice, progress quietly, and eventually show up as swollen furniture, bubbling wall panels, a moldy smell, rusted sheet metal, and rotting wood. In this guide, based on 2025 standards, we cover caravan water leaks and moisture issues:
- How to catch them early,
- Where they typically come from,
- What steps you need to take to repair them,
- And most importantly, how to prevent them for good
— covering it all in a way that’s both technically grounded and user-friendly.
1. The Main Sources of Water and Moisture Problems in Caravans
Water and moisture problems in a caravan generally come from four main sources:
- Water entering from outside: roof vents, window seals, roof rails, solar panel mounting feet, rear door / sliding door seals, hairline cracks in the sheet metal.
- Water from interior plumbing: the fresh water line, pump connections, hot water system, sink and shower drains, and around the cassette toilet.
- Moisture from condensation: gaps in thermal insulation, poor ventilation, shower and cooking steam, and moisture from breathing while asleep.
- Grey water and waste water: drain lines, S-trap valves, grey water tank connections, and incorrect slope.
Because of this, when a caravan has a water or moisture problem, you need to check systematically both from the top down (roof → ceiling → wall) and along the entire interior plumbing line.
2. How to Catch a Water Leak Early
Water leaks usually seem to appear “all at once, like a glass overflowing,” but in most cases they’re leaks that have been creeping along, millimeter by millimeter, for months without you noticing. To catch them early, you should regularly run through these checks:
2.1 Visual Inspection
- Is there discoloration, yellowing, or swelling where the ceiling meets the walls?
- Is there bubbling or black spots (mold) forming under the windows?
- Is there softening, bulging, or separation at the seams along the bottom edges of furniture?
- Do you feel a “wet spot” between the wall lining and the sheet metal?
2.2 Touch Inspection
- Does pressing on the ceiling panels feel spongy?
- Does the lining feel “soft” instead of making its normal “crinkly” sound?
- Does your hand feel slight dampness at the corner seams?
2.3 Odor and Moisture Check
- Does a heavy, damp smell hit you when you open up the caravan after it’s been closed for a while?
- Do the windows fog up excessively while you sleep at night?
- Is there a sharp, damp smell inside the cabinets?
If you notice one or more of these signs, it’s time for a systematic leak and moisture inspection.
3. Leaks From Outside: Roof and Doors
3.1 The Roof Fan and Roof Openings
The points that take on the most water in a caravan are the roof fans, roof windows, and solar panel mounting feet. Typical problems include:
- Aging sealant and silicone cracking
- Parts held in place with silicone alone, without adhesive
- Micro-cracks around screws
Inspection and fix:
- Get up on the roof and visually inspect around every fan and window
- Remove any cracked, yellowed, or bubbling sealant and redo it with butyl tape plus quality caravan-grade sealant
- Check each screw head individually; tighten loose ones, and replace them if needed
3.2 Door Seals and Corners
Water leaking in around the sliding door or rear door is very common. In particular:
- Worn seals
- Poorly aligned doors
- Water pooling in the channel above the door
If you notice water marks inside after closing the door in the rain, have someone spray water gently over the area from outside with a hose while you watch closely from inside. Seeing the splash and flow direction makes it much easier to pinpoint the leak.
4. Water Leaks From Interior Plumbing
Interior plumbing leaks usually show up around the fresh water system or hot water appliances.
4.1 The Fresh Water Line and Pump Area
The main points you need to check:
- The pump’s inlet and outlet connections (hose clamps, quick-connect fittings)
- The tank outlet valve and unions
- The filter’s inlet/outlet connections
- Sink and shower mixer taps
A simple test: if the pump keeps switching itself on periodically while no faucet is open anywhere in the caravan, there’s most likely a micro-leak somewhere in the system. The pump kicks in to compensate for the resulting pressure drop.
4.2 Hot Water Systems
The area around gas, diesel, or electric hot water heaters is always a risk zone:
- Safety valves can drip
- Aging gaskets can leak
- Hoses connected with the wrong slope can seep at elbow points
Wipe the area completely dry with a cloth, then run the system and check again — the first drops that appear point straight to the leak location.
5. Grey Water, Waste Water, and Hidden Moisture Sources
5.1 Drain Line and S-Trap Problems
The drain line under the sink or shower can be a source of both odor and leaks:
- Loosely tightened trap connections
- Incorrect slope on the waste-water hoses
- Plastic traps stressed by vehicle movement
Pouring some water into the sink and running a tissue around the trap and hose joints will reveal even the smallest leaks.
5.2 Grey Water Tank Venting
If there’s a vent line for odor control, a poorly positioned opening can allow water in over time. The vent opening should:
- Not be directly exposed to wheel spray,
- Be positioned high enough to avoid road water,
- Be protected, where possible, with a downward-facing cover
These conditions should all be met.
6. Moisture From Condensation: Not a Leak, But Just as Dangerous
Condensation isn’t a “water leak” in the classic sense, but the end result is still water. In particular:
- Poorly insulated roof ribs and metal frame members,
- Uninsulated rear door interiors,
- Sheet metal surfaces around windows,
can turn “sweaty” and damp in the mornings.
6.1 What to Do to Reduce Condensation
- Proper thermal insulation with closed-cell rubber foam
- Insulating thermal bridges (metal profiles) as much as possible
- Active ventilation with the roof fan plus a window after showers and cooking
- Keeping indoor laundry drying to a minimum
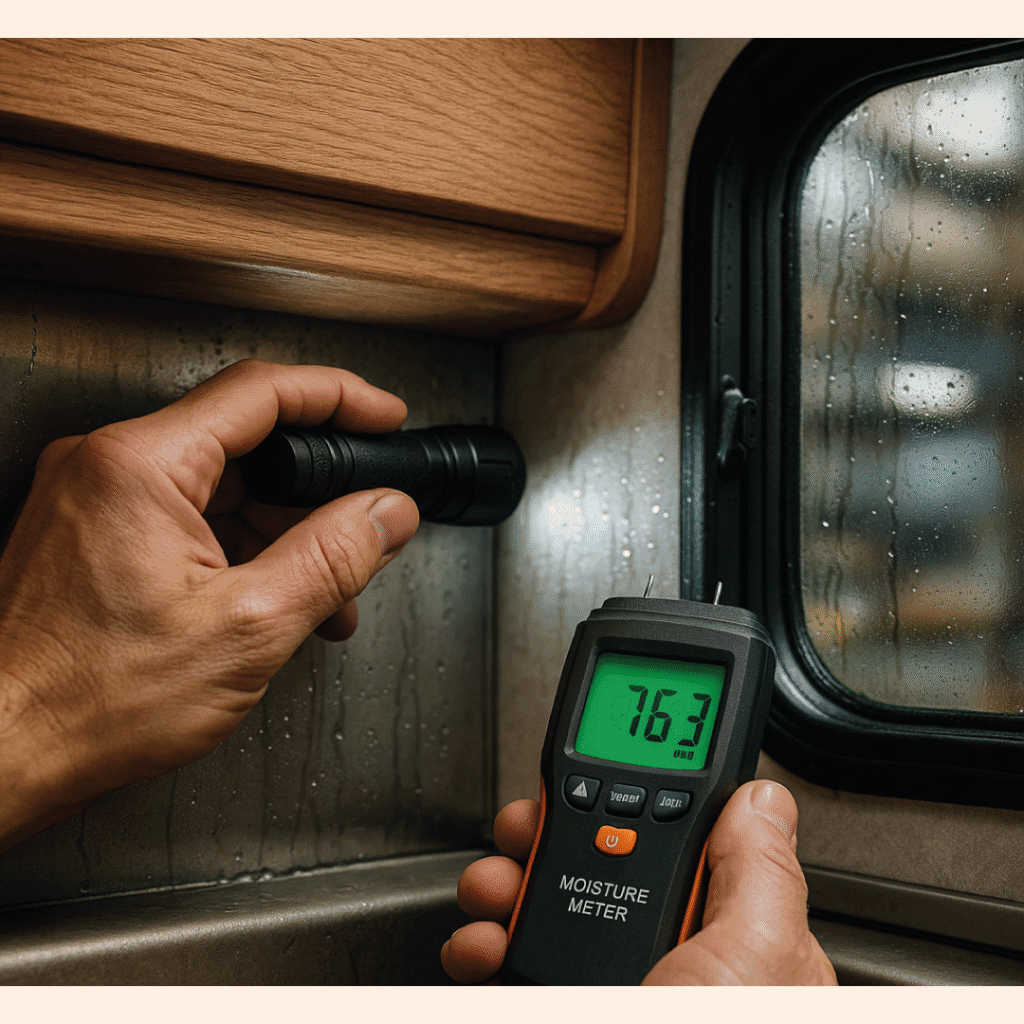
Condensation can cause serious mold, especially in hidden spots behind furniture. That’s why it’s worth tracking things with a moisture meter regularly, even if there’s no obvious leak.
7. Practical Testing Methods for Detecting Water Leaks
7.1 A Controlled Hose “Rain Test”
To find leaks on the exterior of the caravan:
- Have one person slowly wet a specific area from outside with a hose
- Have another person watch the same area from inside
- Work through the roof → roof fan → windows → doors, in that order
This gives you a real-time view of exactly where water is getting in.
7.2 The Paper Towel / Tissue Test
One of the simplest, most effective methods for interior plumbing leaks:
- Place paper towels or tissue under every connection point
- Pressurize the system (run the pump, turn on the hot water)
- Check the paper towels after a while; the damp section points to the leak
7.3 Tracking With a Moisture Meter
Placing small digital moisture and temperature sensors at high-risk spots inside the caravan (under the bed, inside cabinets, on the bathroom’s exterior wall) lets you catch above-normal moisture increases early.
8. Repair Principles: Permanent Fixes, Not Temporary Patches
The goal in any water- or moisture-related repair should always be a permanent fix. The “squeeze some silicone on it and call it done” approach usually just hides the problem from view.
8.1 Replacing Damaged Material
- Swollen MDF panels should be replaced where possible
- Moldy foam and insulation material should be removed
- Rusted sheet metal surfaces should be sanded down and protected with a rust converter and primer
8.2 Using the Right Sealing Materials
For exterior sealing on a caravan, you need different products than the silicone you’d use in a kitchen:
- For roof work, butyl tape plus caravan-grade sealant (UV-resistant)
- For interior wet areas, quality silicone or MS polymer-based sealants
- For drain and hose pass-throughs, suitable rubber grommets
9. Preventive Maintenance: Checks to Repeat Every Season
The best way to eliminate water and moisture problems is with short maintenance routines repeated every year:
- Checking the sealant around the roof and roof fan at the start of spring
- Going over all water connections with a flashlight and tissue
- Testing the grey water tank and drain lines for leaks and odor
- Periodically tracking indoor moisture and temperature levels
This way, you can catch small leaks before they turn into major damage.
10. Frequently Asked Questions
How do I know if my caravan has a water leak?
Yellowing on the ceiling and walls, softening under the wall lining, a heavy odor inside cabinets, the pump switching on by itself, and damp corners are the main signs of a water leak in a caravan.
There’s a musty smell but no visible water — is that normal?
No. This usually points to condensation or a hidden leak somewhere. Areas behind furniture and under insulation should always be checked.
I couldn’t find a leak, but the windows fog up a lot. What’s causing that?
This is more likely a ventilation and condensation issue. It can be reduced significantly by using the roof fan effectively, insulating properly, and airing the caravan out regularly.
Will silicone-ing everything solve the problem?
Usually not. Silicone applied to the wrong surface or in the wrong way can actually trap water inside. You need to find the source first, then address it with the right material.
What happens if a water leak goes unnoticed for a long time?
Long-unnoticed leaks can lead to serious problems, from swollen furniture and rusted sheet metal to rotting insulation, mold, and health issues. That’s why early detection matters so much.