
Shape Flexibility and Modular Design in Caravan Interiors
In 2025, the priority for caravan owners is no longer just a “nice interior design” — it’s an interior architecture that adapts quickly to changing scenarios, is easy to maintain, safe, and lightweight. At the heart of this are shape flexibility and modularity. Being able to use the same space as an office in the morning, a dining area at noon, and a bedroom in the evening creates a huge sense of living comfort in a small vehicle. This guide offers an in-depth framework covering everything from convertible furniture and movable partition walls to modular kitchen/bathroom solutions, material choices, weight and center-of-gravity management, electrical-water-gas interface standards, and safety, acoustics, ergonomics, and maintenance planning.
Clarify Your Design Goals: What Will Flexibility Solve?
- Multi-purpose use: The same space changing roles throughout the day (work/dining/sleeping).
- Quick conversion: Being able to switch modes within 2–3 minutes.
- Lightness: Critical for fuel/range and load limits.
- Durability: Resistance to vibration, heat, humidity, and UV exposure on the road.
- Safety: Secure fastening, locking, no sharp edges, fire/gas/water safety.
- Maintenance and access: Quick access to installations; modules that are easy to remove and reinstall.
Convertible Furniture: One Piece, Several Scenarios
Bed-sofa conversion: L/U-shaped sofas used during the day can open up into a full or half double bed in the evening. Click-clack mechanisms or sliding rail systems make the conversion easy with a single motion. Cushion densities (e.g. 30–35 kg/m³) reduce sagging over long sitting sessions. Zippered, washable covers improve hygiene.
Folding tables and multi-purpose surfaces: Table panels that hang or fold against the side wall combine work and dining functions. Choose “drop-leaf” hinges rated for load bearing; a locked support in the open position is essential. Hidden outlets/USB-PD ports under the table reduce both cable clutter and adapter confusion.
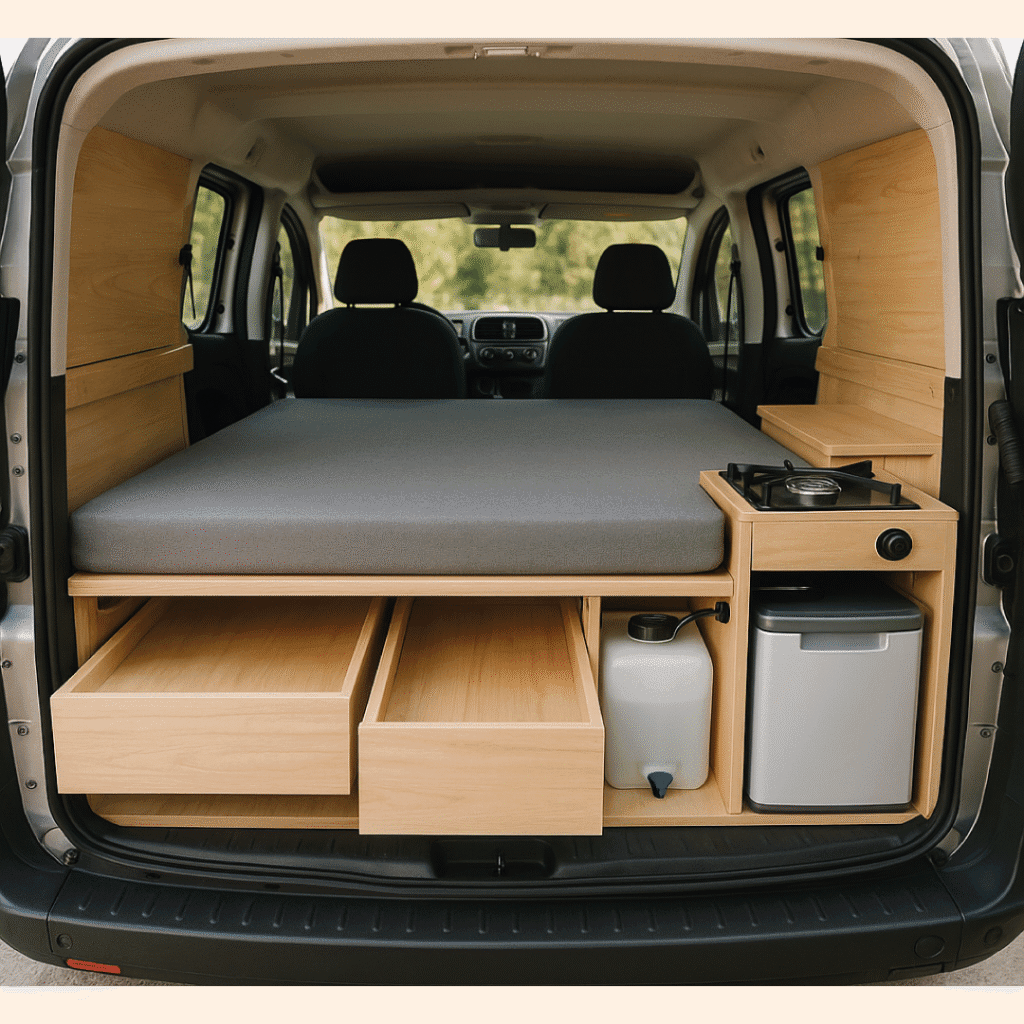
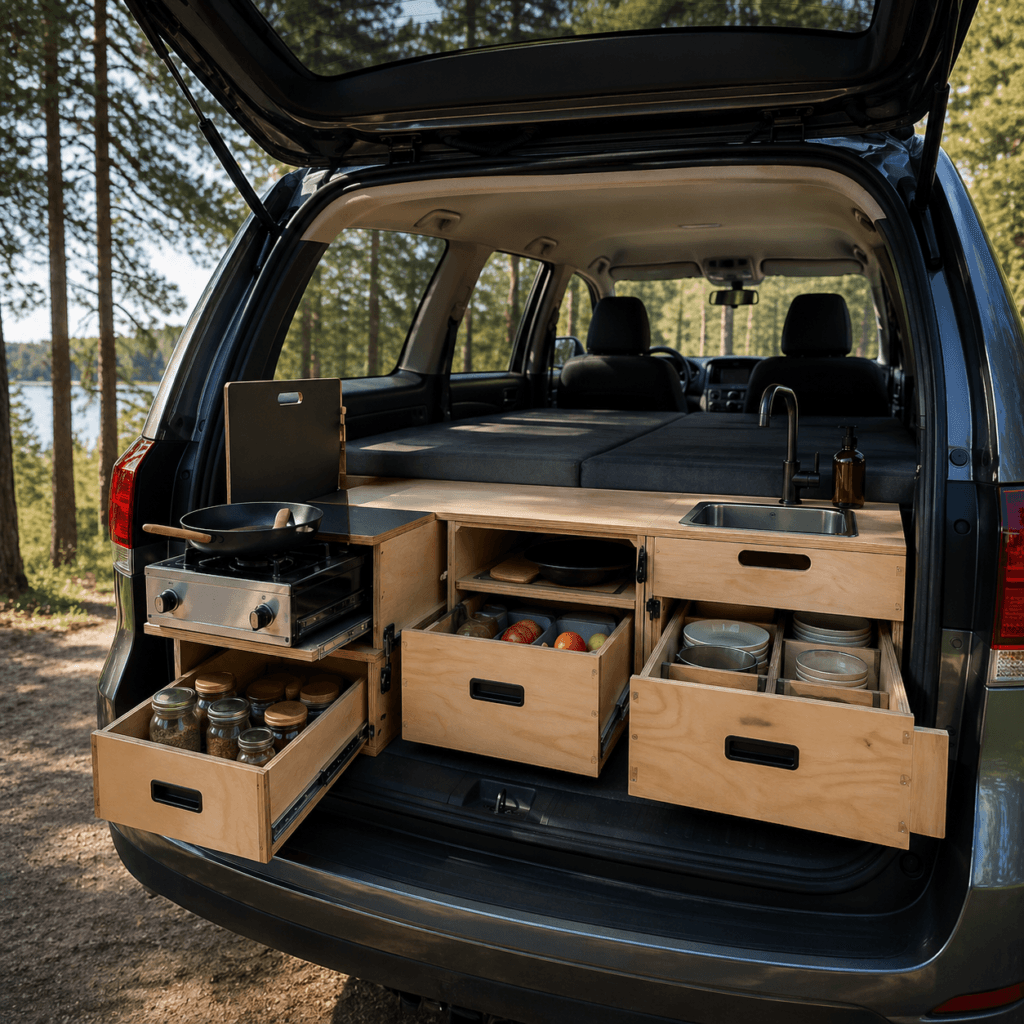
Under-floor and niche storage: Storage bases, seat interiors, thresholds, and steps offer extra volume. Vibration-resistant slam-latches and gaskets significantly reduce squeaking and rattling. Always place heavy items low and close to the axle line; this improves driving stability and the feel of brake balance.
Movable Walls and Partitions: 1 Space, 3 Functions
With rail-and-slide, accordion, or folding partitions, it’s possible to turn a single space into dedicated areas based on hourly needs. For work-area isolation, lightweight acoustic-fabric-covered panels reduce echo; maintain top-and-bottom air circulation without cutting off heating/humidity lines. An accordion door for the bathroom, a translucent sliding panel for the kitchen, and an opaque partition for the sleeping area provide both light control and privacy.
Choosing guide rails: Aluminum T-rails are lightweight; ball-bearing sliders run quietly. Locking panels in the open/closed position prevents swaying on curves. Using a brush seal at the base of the slider can reduce floor friction and dust ingress.
Modular Systems: Kitchen & Bathroom Interfaces
Kitchen module: A “single block” design is ideal with a removable stove (gas or induction), a folding sink, a covered drip tray, and a sliding fridge drawer. Use quick-connect couplings for water inlets/outlets and a multi-pin locking socket for electricity. This way the module can be removed and serviced in 5–10 minutes.
Bathroom module: A folding shower tray, an accordion door, and a compact cassette toilet provide ergonomics in a tight space. A ceiling fan (with adjustable extraction direction) and a vent are essential to quickly clear moisture after a shower. Electrical outlets in wet areas must be IP-rated and located outside the splash zone. Non-slip flooring and rounded corners improve safety.
Material Selection: Light, Durable, Quiet
Panels: Honeycomb composites (PP honeycomb), thin-layer plywood (okoume/birch), and high-density foam sandwiches are both lightweight and rigid alternatives. Use high-impact-resistant material (ABS/PMMA) for edge banding. On UV-exposed surfaces, choose coatings that reduce yellowing/fading.
Frame and joints: Building the module chassis with aluminum profiles + corner brackets offers ease of assembly/disassembly and servicing. Screwed joints should be supported with threadlocker to prevent loosening from vibration. At structural points, epoxy or PU-based adhesives combined with spot-welding produce a quieter cabin.
Insulation and acoustics: Closed-cell elastomeric foam reduces thermal bridging between wood/composite panels. A thin acoustic felt layer reduces door/drawer slamming noise. Choices of gaskets and seals resolve about 80% of later “rattling” complaints.
Weight, Load Distribution, and Center-of-Gravity Management
The real risk in a flexible interior architecture is convertible parts causing uncontrolled weight gain that makes the vehicle sluggish. The following principles are critical:
- Central mass: Place heavy modules close to the axle line and close to the floor.
- Symmetry: A weight difference between the driver/passenger side is noticeable during braking and on curves; distribute weight evenly.
- Ease of removal: If you’re close to the load limit, remove quick-detach accessories (e.g. the outdoor kitchen module) when needed.
- Roof load: A roof rack/box should be the last resort; it increases wind noise and sway.
Electricity, Water, Gas: Modular Interface Standards
Electricity: Use a 12V DC main line with protected fuse distribution, and a separate circuit with residual current protection (RCD) for AC 230V. Multi-pin locking connectors between modules (e.g. bayonet) prevent incorrect connection. USB-C PD outlets (e.g. 65W) can power work modules without an adapter.
Water: Quick-coupling hose ends (color-coded: blue/clean, gray/waste) reduce dripping during assembly/disassembly. An odor trap and ventilation are essential for the gray water tank. For winter use, plan insulation and heating cables along the lines against the risk of freezing.
Gas: If a gas stove/heater is used, professional installation, a leak-tightness test, and proper ventilation are mandatory. In modular assemble/disassemble setups, use secure locking and leak sensors (LPG/CO) on quick-coupling gas connections. Alternatively, a gas-free ecosystem can be built with electric induction and a diesel heater.
Airflow, Light, and Sun Management
A flexible layout only makes sense when supported by a comfortable climate. Large windows and opening roof ventilation fans maintain the temperature and humidity balance between modes. Shading (awning, exterior blinds, interior blackout) reduces the thermal load in summer. Double-glazed windows and thermal curtains are effective solutions for reducing heat loss in winter. Controlling task, ambient, and accent lighting layers with separate circuits improves usage comfort.
Safety: Fastening, Locking, Fire, and the Road
- Fastening rails: Lock modules with bolts and clips using L-track/airline rail or hidden anchor points.
- Locks and latches: Vibration-resistant locking on every moving element; no swaying allowed while driving.
- Fire: A fire extinguisher at two points, a fire blanket near the stove; cable gauge and fuses must be correct.
- Leaks and alarms: Position CO, LPG, and smoke sensors independently of one another.
- Emergency access: The electrical fuse box, gas valve, and water pump must be reachable in a single motion.
Ergonomics: Human Measurements and Clearances
Small ergonomic mistakes in a tight space cause major discomfort. Plan seat height in the 42–46 cm range and tabletop height in the 70–74 cm range. The walkway should not go below 45 cm; 50–55 cm is ideal at critical points. Upper cabinet doors should open at an angle and limit that reduces the risk of head impact. Test shoulder width and knee-turning clearance in bed mode; even an extra 5 cm of space can change sleep quality.
Maintenance, Servicing, and Lifecycle
The real strength of modular design shows up in lifetime management. Route installation lines through removable shafts; number the connection terminals. Sticking a small service diagram and fuse list behind a cover panel can be a lifesaver in case of a breakdown on the road. Carry a touch-up paint/patch kit for surfaces. Split modules into an A (seasonal), B (annual), C (2–3 year) maintenance plan based on usage intensity.
Module Comparison Table (Example)
| Module | Typical Weight | Installation | Pros | Cons |
|---|---|---|---|---|
| Bed-Sofa | 25–45 kg | Rail/hinge | Multi-purpose | Mechanism maintenance |
| Kitchen Block | 28–55 kg | Quick coupling | Easy to service | Dense plumbing/wiring |
| Bathroom Module | 20–35 kg | Accordion/frame | Privacy | Moisture management required |
| Movable Partition | 8–18 kg | Rail/lock | Flexibility | Needs extra locking |
Implementation Steps: A Quick Roadmap
- 1) Needs map: Map out your daily routines hour by hour; which modes do you actually need?
- 2) Weight budget: Set a weight target for all modules; limit roof and rear axle loads.
- 3) Interface standard: Fix the electrical/water/gas connector types and locations from the start.
- 4) Prototype: Test human movement with a cardboard/plywood mock-up before moving to final materials.
- 5) Fastening plan: Document L-track/anchor locations, bolt sizes, and locking points in writing.
- 6) Test and refine: Squeak-hunting on rough roads, hot/cold scenarios, night/sleep testing.
Conclusion
Flexibility and modularity make big living possible in a small space. When convertible furniture, movable partitions, and removable kitchen-bathroom blocks are combined with lightweight, durable, and quiet materials, your caravan can take on different roles within the same day. Without weight/center-of-gravity management, secure fastening, standard interfaces, and a good maintenance plan, this flexibility isn’t sustainable. With the right planning, 2025’s caravans are now a personal platform: wherever you go, the space reshapes itself along with you.
Campexpert brings together practical solutions and in-depth technical content for caravan design. Share your experiences in the comments; let’s grow this guide together with the community.