
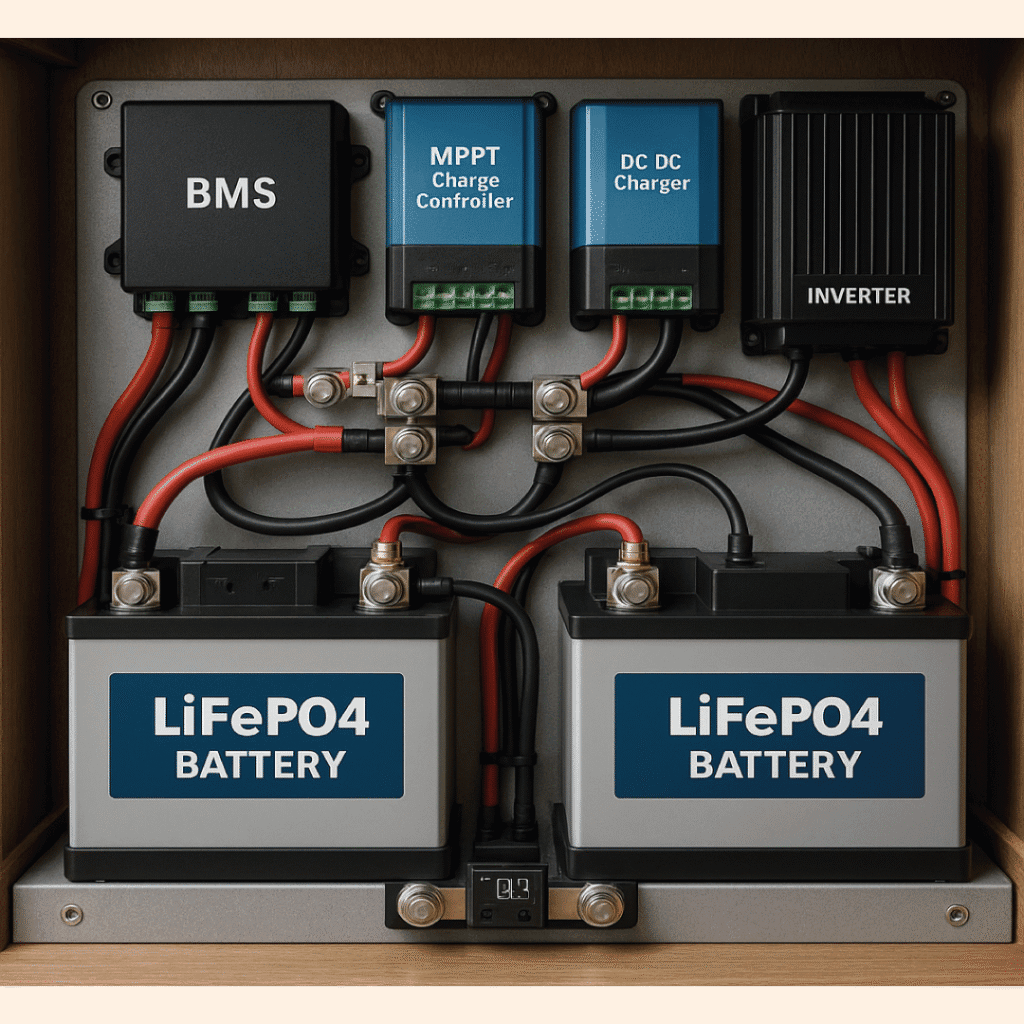
LiFePO4 batteries have become the most popular energy solution in caravanning in recent years, thanks to their long lifespan, high safety, and fast-charging advantages. But getting the most out of them requires correct wiring, the right BMS choice, and safe installation. A poorly installed system can lead to capacity loss, equipment failures, or risky overheating issues.
In this guide, we walk step by step through every component, cable gauge, wiring diagram, and safety step you need for a complete LiFePO4 system installation in your caravan.
What Is a LiFePO4 Battery?
LiFePO4 (Lithium Iron Phosphate) batteries are lithium-based batteries that run far more efficiently, heat up less, and last much longer than traditional gel, AGM, or lead-acid batteries. Their advantages include:
- Cycle life: 3,000–6,000 cycles
- Safer chemistry: low risk of thermal runaway
- Compatible with fast charging
- Up to 90% usable capacity
- Low weight — around 50% lighter than an AGM battery of the same capacity
Equipment You Need for a LiFePO4 System Installation
- LiFePO4 battery (100Ah, 150Ah, 200Ah — depending on your needs and budget)
- BMS (Battery Management System)
- Shunt current meter (Victron SmartShunt or similar)
- MPPT solar charge controller
- DC-DC charger (for safe charging from the vehicle’s alternator)
- Fuses — ANL or MEGA
- Cables of the correct gauge (16mm² to 50mm²)
- Battery connection busbars
Why Is a BMS (Battery Management System) Mandatory?
LiFePO4 batteries are built from individual cells. The BMS is effectively the brain that keeps those cells balanced in voltage and temperature. A lithium battery without a BMS can be damaged by overcharging, over-discharging, or a cell overheating.
- Overcharge protection
- Over-discharge protection
- Temperature monitoring
- Cell balancing
Wiring — Choosing the Correct Cable Gauge
Cables are the backbone of a caravan’s electrical system. Using the wrong gauge creates a risk of overheating and fire.
| Current (A) | Cable Gauge | Recommended Use |
|---|---|---|
| 0–50A | 6mm² – 10mm² | Small appliances, LED lighting |
| 50–100A | 16mm² | DC-DC charger |
| 100–150A | 25mm² | Battery output lines |
| 150–250A | 35mm² – 50mm² | Inverter connection |
In short: as the current increases, the cable gauge needs to increase too.
LiFePO4 System Wiring Order
- Secure the battery firmly in its mounting position.
- Make the BMS connections and configure it according to the manufacturer’s instructions.
- Add the shunt current meter to the battery’s negative line.
- Connect the MPPT solar panel wiring.
- Connect the DC-DC charger to the vehicle.
- Connect the inverter and install the fuses.
- Test the system under a light load.
Safety in LiFePO4 Systems
Lithium systems are very safe when installed correctly, but a few basic safety rules still need to be followed:
- There must always be a main fuse near the battery
- Cable ends should be crimped with proper terminal lugs
- Cable connections should never be left loose
- The battery mounting area needs good ventilation
- The MPPT and inverter should be mounted with adequate clearance
Frequently Asked Questions
Is a LiFePO4 battery better than an AGM battery?
In most cases, yes — thanks to its longer lifespan, lighter weight, and higher usable capacity. However, it costs more upfront.
Can I charge LiFePO4 batteries from a household outlet?
Yes, with a smart LiFePO4 charger designed to work at the correct voltage.
Can a LiFePO4 battery be used without a BMS?
Absolutely not. Using a lithium battery without a BMS is dangerous.
Does the vehicle’s alternator charge a LiFePO4 battery directly?
No. A DC-DC charger is always required.
Does a LiFePO4 battery freeze in winter?
The cells can withstand temperatures down to -20°C, but they should not be charged below freezing. A BMS with a built-in heater solves this problem.